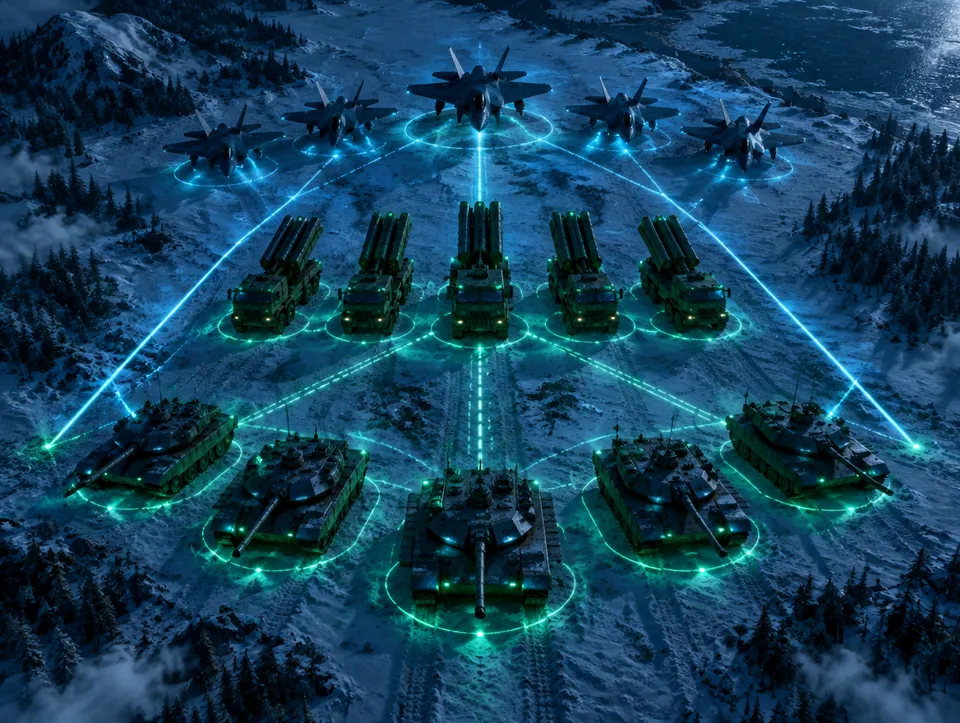
Core Logic of Team Composition
A team consists of five heroes: two in the front row and three in the back. The front row absorbs damage, buying time for the damage dealers and supporters in the back. Therefore, it is more practical to start by defining each hero’s role rather than simply sorting them by total power. The Squad Building Guide also treats the front/back row distinction as a fundamental decision.
The first question should not be “Who is my strongest Hero?” but “What do I expect this Hero to do in battle?” Keeping a defensive-role Hero in the front row allows the offensive role in the back to perform effectively. A support role may appear weak if evaluated solely by direct damage numbers; its contribution must be assessed across the entire team. Choosing positions based only on rarity or apparent power without considering the Hero’s role is therefore an unreliable method.
| Decision | Question to Ask | Initial Application |
|---|---|---|
| Troop Type | What is the opponent’s dominant type? | Evaluate the advantageous type in the counter-cycle. |
| Front Row | Who will absorb the initial damage? | Place durable defensive roles in the two front slots. |
| Back Row | Who will provide damage and support? | Assign attack and support roles to the three back slots. |
| Same-Type Bonus | Which distribution can your squad form? | Weigh the bonus alongside the Heroes’ actual contributions. |
| Outcome | Which setup worked better? | Compare battles under similar conditions. |
For beginners, organizing these five decisions sequentially is clearer than dismantling the entire team after every failed battle. If you are still getting used to general game progression, use the Beginner’s Guide to establish the basic layout, then address combat decisions with this article. HQ development also affects overall progress; however, do not change your development plan based on a single battle’s outcome. See the HQ Upgrade Guide for relevant steps.
Troop Types and the Counter-Cycle
The three main types are Tank, Missile Vehicle, and Aircraft. The cycle is as follows: Tanks are strong against Missile Vehicles; Missile Vehicles are strong against Aircraft; Aircraft are strong against Tanks. Every strong matchup has a corresponding weak one. This means no single type is the best choice against all opponents. The Combat Mechanics Explanation describes type matchups through damage exchange.
| Your Type | Strong Against | Weak Against | Practical Question |
|---|---|---|---|
| Tank | Missile Vehicle | Aircraft | Is the opponent primarily using Missile Vehicles? |
| Missile Vehicle | Aircraft | Tank | Is the opponent primarily using Aircraft? |
| Aircraft | Tank | Missile Vehicle | Is the opponent primarily using Tanks? |
Research notes indicate that the advantage in favorable matchups provides a 20% increase in damage dealt and a 20% reduction in damage taken. Do not arbitrarily sum these effects to conclude you have a “40% stronger team” in every battle. Damage dealing and damage taking are different metrics; Hero development, front-row durability, and other factors alter the real outcome. Use these ratios as mechanics demonstrating why checking the opponent’s type matters.
If you can see the opponent’s team, determine their dominant type before making selections. Then check the roles and development of the Heroes you can use in the advantageous type. If your team in the advantageous type is incomplete, also observe how your well-established current team performs. It is illogical to choose a setup that leaves the front row empty just because of the counter-cycle.
If the opponent’s lineup is unknown, you cannot assume you have chosen the exact counter-type. In this case, use your most consistent team and gather information from the result. When facing the same opponent or a similar encounter again, you can test the difference by changing types. Avoiding simultaneous changes to Hero positions, equipment, and other conditions makes it easier to interpret comparison results. You can also use the type and role explanations in the General Combat Guide for this purpose.
Hero roles: defense, attack, and support
The job of the Defense role is not just to carry a power stat; it absorbs the initial pressure to protect backline units. The Attack role generates damage during this time. The Support role contributes to team functionality. Reducing these three roles to a single "strongest hero" ranking makes it difficult to understand why you lose in formation. If the frontline falls early, your backline heroes may not have enough time to utilize their high potential.
When determining roles, evaluate both the hero's in-game definition and their observed behavior in battle. Do not assume that a hero with high attack power is suitable for the frontline. Conversely, moving a Defense-role hero to the back solely because they deal lower damage can reduce team protection. Research notes clearly state the basic positioning rule: defenders in front, attackers and supporters in the back.
| Role | Priority Position | How to Evaluate Contribution? | Common Misinterpretation |
|---|---|---|---|
| Defense | Frontline | Look at how much time it creates for the backline. | "Dealt little damage, useless." |
| Attack | Backline | Monitor contribution while protected. | "High power, can place in front too." |
| Support | Backline | Read alongside overall team results. | "Must deal high damage alone." |
This task distinction also applies when examining skills. Research notes describe auto-attacks as regular, tactical skills as effective upon activation, and passive skills as providing continuous contribution. Match these categories to a hero's role: for Attack roles, the tactical skill's impact on battle flow matters; for Defense roles, survival effect is key. If verified data on all skills of a specific hero is unavailable in sources, do not claim universal tier rankings.
Follow the role when equipping gear. Source notes treat weapons and chips from an Attack perspective, and armor and radar from a Defense perspective. Armor counters physical damage; radar counters energy damage. Interpreting a defeat only as "need more damage" misses this distinction; if the frontline collapses quickly, examine the defensive side too. For broader resource development decisions, see the resource and stamina guide.
How to position frontline and backline?
Place heroes capable of fulfilling durability duties in both frontline slots. Arrange Attack and Support roles across the three backline slots. This is a clear skeleton for starting out, not a memorized "single correct squad" with specific hero names. Research files do not provide verified universal best-squad lists. Therefore, instead of relying on recipes tied to heroes you don't own, reading current heroes' functions and building formations accordingly is more practical.
Evaluate the frontline by considering two heroes separately. Losing one side very early can shorten the entire backline's protection window. If you can observe battle events, check which frontline hero fell first and how backline contribution changed afterward. This observation alone doesn't prove causation but helps select what to change first. Swapping the same heroes yields more readable results than changing all equipment simultaneously.
Placing three Attack heroes in the backline cannot be written as the best choice under all conditions. The Support role can contribute to other team members. Conversely, a setup that only increases durability without sufficient damage may fail to complete objectives. Thus, view the "two defensive fronts, three offensive or supportive backs" rule as a starting arrangement; align it with battle outcomes.
Pre-setup quick check:
- Write down Defense, Attack, or Support role for each of the five heroes.
- Place two Defense roles in the frontline.
- Distribute Damage and Support roles across three backline slots.
- If opponent type is visible, check advantage cycles.
- Check same-type bonuses; don't weaken the frontline solely for bonus purposes.
- Treat the first battle as a baseline measurement; try only one change based on results.
These steps are especially useful when using multiple squads. Instead of trying to perfect every squad simultaneously, clearly define which squad to use in which encounter. Also consider squad availability during Alliance events and rally participation. For Alliance structure, read the Alliance guide; for product-side limits on rally participation, see the features page.
How to Evaluate Same-Type Bonuses
As the number of heroes of the same type increases, the formation bonus rises. According to research files, the distribution is 5% for three of the same type; 10% for a mixed squad split into three and two; 15% for four of the same type; and 20% for five of the same type. Do not confuse the "three plus two" distribution with "all five the same": it uses two types but has its own bonus tier. Squad bonus explanation is a useful external source for reviewing these distributions.
| Hero Distribution | Bonus Given in Research | Implication for Squad Decision |
|---|---|---|
| Three of the same type | 5% | Forms a core of the same type. |
| Three plus two | 10% | An intermediate option built with two types. |
| Four of the same type | 15% | Also check role compatibility for the fifth slot. |
| Five of the same type | 20% | The highest listed same-type bonus. |
The fact that five of the same type provides the highest bonus does not necessarily mean every player will achieve the best result with it in every encounter. The bonus is only one part of squad selection. If the fifth same-type hero is insufficiently developed or cannot fulfill their front-line duty, the practical contribution of the higher bonus may be less than expected. Additionally, if the opponent's type has an advantage against yours, this is a separate issue that cannot be solved by the bonus table alone.
When making decisions, prepare two candidate squads: the most consistent five-same-type layout available to you, and an alternative layout where roles fit better. Clearly define the front and back row duties for both. Compare their results in similar encounters. This way, you can make decisions based on your own squad rather than relying on absolute judgments like "mono squads always win" or "mixed squads are always more flexible."
You can also use the bonus table as an upgrade plan. Identifying missing roles in your targeted type is more beneficial than randomly distributing resources. However, do not spend all resources based solely on looking at one table. For general progression and resource selection, evaluate the resource gathering guide and the daily missions guide separately.
Selection Based on Opponent and Battle Type
In PvP battles, if you can see the opponent's type, the advantage cycle becomes a direct selection tool. Consider Aircraft against Tank-heavy opponents, Missile Vehicles against Aircraft-heavy opponents, and Tanks against Missile Vehicle-heavy opponents. However, if the heroes in your advantageous type do not complete their roles, do not reduce the encounter to type names alone. Front-line durability, back-line contribution, and same-type bonuses must be read together.
In PvE encounters, research notes emphasize durable front lines and protected back lines; they do not offer verified separate type recipes for each target. Therefore, do not treat all PvE targets as a single enemy type. Also consider the energy required by the target and squad usage. The Energy management guide helps plan this resource side; it does not replace battle lineup placement.
For example, if you are sending a squad against Invading Zombies, first ensure that squad is available, then observe how your current lineup holds up. The Invading Zombie guide focuses on the target's specific flow. In Radar missions, do not assume every mission involves combat; the Radar missions guide helps distinguish different tasks. The goal here is not to confuse mission selection with battle squad decisions.
A small decision sequence is sufficient for an encounter:
- Separate what you actually see about the target or opponent.
- Apply the advantage cycle if the opponent's type is visible.
- Check the front line and back-row roles of the selected squad.
- Look at the same-type bonus, but do not ignore missing roles.
- Record the result; change only one preference in the next attempt.
This sequence prevents random squad changes. Especially after losing to strong opponents, understanding why the loss occurred before directly changing heroes prepares a better foundation for the next attempt.
How to Read Battle Reports
The full screen areas and calculation formulas for battle reports have not been verified in the research files. Therefore, it would be inaccurate to describe a specific report column as if it definitively exists. However, you can establish a systematic reading method that correlates battle outcomes with your own decisions. Use the information provided in the game's reports or battle logs; do not fill missing data with guesses.
On the first pass, identify the encounter: which squad was used, what was the opponent's visible type, and what was the result? On the second pass, examine the formation: did your two front-row Heroes protect the back row for the expected duration, and did the back row contribute to the battle flow? On the third pass, note the differences: since the previous attempt, what changed regarding type, order, equipment, or other variables? If many changes occurred, do not attribute the result to a single factor.
| Observation | Potential Area of Review | Next Attempt |
|---|---|---|
| Front line collapsed quickly | Defense role, positioning, protective gear | Change one specific choice in the front line. |
| Back line became ineffective early | Front line protection and back line role compatibility | First review the protection setup. |
| Opponent's type had an advantage | Unit superiority cycle | If appropriate, retry against the counter-type. |
| High Power, weak result | Combined effect of type, role, and bonuses | Compare formations instead of just Power numbers. |
| Result changed, cause unclear | Multiple variables may have changed simultaneously | Make a new comparison changing only one variable. |
This table is not a direct translation of a report screen but a tool for organizing observations derived from the report. For example, when the front line falls quickly, the cause might not be solely equipment; the opponent's type advantage could also be effective. First, separate observation from interpretation. "Front Hero fell early" is an observation; "the sole cause was Radar level" is an interpretation that needs separate testing.
You can use a short note template: "Target, my type, opponent's visible type, front line, back line, single item changed, result." Keeping this for several encounters is more consistent than making memory-based decisions. The same conditions may never be replicated exactly; therefore, do not present small differences as definitive proof. Distinct and repeated patterns are more valuable.
For instance, consider a scenario where your Tank-heavy squad loses to an Aircraft-heavy opponent. If your first note says "squad power wasn't enough," you compress the type disadvantage and the effect of ordering into the same explanation. First, record the opponent's visible type: in the superiority cycle, Aircraft has an advantage over Tanks. Then look at the roles of the two front Heroes. Even if the defense role was correctly placed, they might have fallen early in this matchup; this observation alone does not indicate you must immediately replace them with different roles. If you have a suitable Missile Vehicle squad, you can try the counter-type; otherwise, you can examine the current squad's front line and equipment setup in a separate trial.
In the second trial, if you only changed the squad type, you can compare wins or losses with the first trial more meaningfully. However, if the Hero development and role distribution differ between the two squads, the result cannot be attributed solely to type advantage. Clearly state these differences in your notes. In another trial where you keep the type constant and only swap the positions of the two front Heroes, observe which side collapses first. When measuring the impact of position swaps, keeping the back line and equipment unchanged simplifies interpretation.
This logging method works for defeats as well as victories. In a won battle, if the front line's protection was sufficient, do not make the next development decision solely for more durability; also examine the back line's contribution. In a lost battle, if the back line appears ineffective, first determine whether it received adequate protection from the front line. Thus, every result generates a specific question, clarifying the purpose of the next trial.
Consider Skills and Equipment Alongside Formation
A Hero's position in the formation should align with the purpose of the skill you are developing. If the front-line defender's job is to endure, focus on the defense side; if the back-line attacker's job is to deal damage, focus on the offense side. Research notes position weapons and chips in the context of attack, and armor and Radar in the context of defense. This distinction keeps clear which weakness you are trying to solve, rather than stacking all equipment onto a single Hero.
Do not lump physical and energy damage under the same heading. Notes indicate that physical damage is evaluated against defensive areas related to Armor, while energy damage is evaluated against those related to Radar. Investing only in offensive equipment when the front line fails to hold may not address the root cause. Conversely, if the front line holds up sufficiently but the back line's contribution seems low, examining the offensive side may be more meaningful. These are not absolute prescriptions but priorities based on observation.
Use the distinction between auto-attack, tactical, and passive skills. Tactical skills can create significant effects when activated; passives provide continuous contributions. When defining a Hero's role, read the skill text, their position in the formation, and the observed battle outcome together. Providing a fixed upgrade level for every Hero or an investment order that fits all players would be more definitive than the available resources support.
Before developing, this short priority order helps:
- Determine where the loss started: front line or back line contribution?
- Check if the opponent's type has an advantage.
- Review the relevant Hero's role and position in the formation.
- Only then plan skill and equipment development.
This order reduces the risk of trying to compensate for incorrect formations by spending more resources. You can also refer to the rapid growth guide for resource accumulation and usage patterns.
Common mistakes and practical fixes
The most common mistake is placing a strong attack-role Hero in the front row just because their power number is high. Front positions carry the protection duty. If the attack Hero is neutralized in the first strikes, you may lose your team's most valuable damage source early. The fix is to re-read the roles and place genuinely durable options in the front row.
The second mistake is never checking the opponent's type. Power comparison is useful, but it does not explain the advantage cycle. Seeing that the opponent uses Tank and entering with Missile Vehicle is one decision; evaluating the Aircraft option is another. The fix is to return to the type table before entering battle and make your choice consciously.
The third mistake is treating the same-type bonus as an absolute rule. It is true that five of the same type give the highest listed bonus; but the team must also provide the two front duties, the back row's contribution, and the opponent matchup. If you are completely emptying a role for the bonus, trying an alternative lineup makes sense. Similarly, building a mixed team just because it looks "flexible" is a choice made without accounting for the bonus loss.
The fourth mistake is changing everything at once after a defeat. If type, order, skill, and equipment change together, what you learned from the next result becomes unclear. The fix is to pick the strongest explanation first and re-measure with a single change. The fifth mistake is treating a single victory as universal lineup proof. A formation that works against one opponent may be at a disadvantage against the opponent on the other side of the cycle.
| Mistake | Why is it a problem? | Better step |
|---|---|---|
| Putting the attacker in front | Front-row protection weakens. | Move the defense role to the two front positions. |
| Looking only at the power number | It hides the type and role difference. | Check the opponent's type and order. |
| Treating the bonus as the only criterion | A missing role goes unnoticed. | Evaluate the bonus and real contribution together. |
| Changing everything at once | No cause can be inferred from the result. | Retry with one variable. |
| Making a firm judgment from a single report | Match conditions can change. | Look for a repeated pattern. |
Keeping time-consuming routines in the game separate from battle analysis is also useful. Last War Bot is an independent Windows automation tool that runs on the official PC client; it is not affiliated with the game's developer. Its ready-made functions include sending the selected team to the Invading Zombie and waiting while the team is attacking; it is not claimed that it analyzes the team formation for you and builds the best lineup. It works by reading the screen and using the mouse; it does not eliminate the risk of automation in terms of game rules. For how it works and its limits, you can check the security page and the installation page.
An actionable team check plan
If you want to organize your lineup today, first divide your existing Heroes into three roles. Then set up a basic formation with two defenders in front and attack and support roles in the back. Write down the team's type distribution and determine which same-type bonus it is in. At this stage, instead of looking for a single "perfect team," create a consistent starting point with the Heroes you actually own.
Then separate the matchups. In battles where you can see the opponent's type, use the advantage cycle; where you cannot, clearly note your assumption. After a battle, do not settle for a "won/lost" record. Look at how long the front row held out, whether the back row did its job, and the effect of the single choice you changed on the result. Do not add numbers to the report that are not on the screen.
In the final step, determine your development priority. If the front row keeps falling, examine protection and type matching first; if the back row is not contributing enough, examine the attack role and related equipment. If you want to raise the same-type bonus, also write down which duty the required Hero will take on in the team. This way, resource spending is directed not just at enlarging the percentage but at solving the problem you actually see.
You can turn the lineup check into a regular routine: re-read the roles when a new Hero or equipment arrives; rethink the matchup when the opponent type changes; review the report after a clear defeat. If your questions are about out-of-game setup or automation, the frequently asked questions page is a separate reference point. The basic criterion of this guide is simple: if type, role, order, and result can be understood in the same decision chain, you can make conscious changes to your team formation.